
Add and manage project photos
Add photos to a project, choose the cover photo, and remove photos you no longer want.
Updated Nov 16, 2026 · iPhone, Android and web · 2 min read
Photos show your quilt in My Projects, in the feed and on the project page. The first photo you add becomes the cover, and you can change it at any time.
Add photos
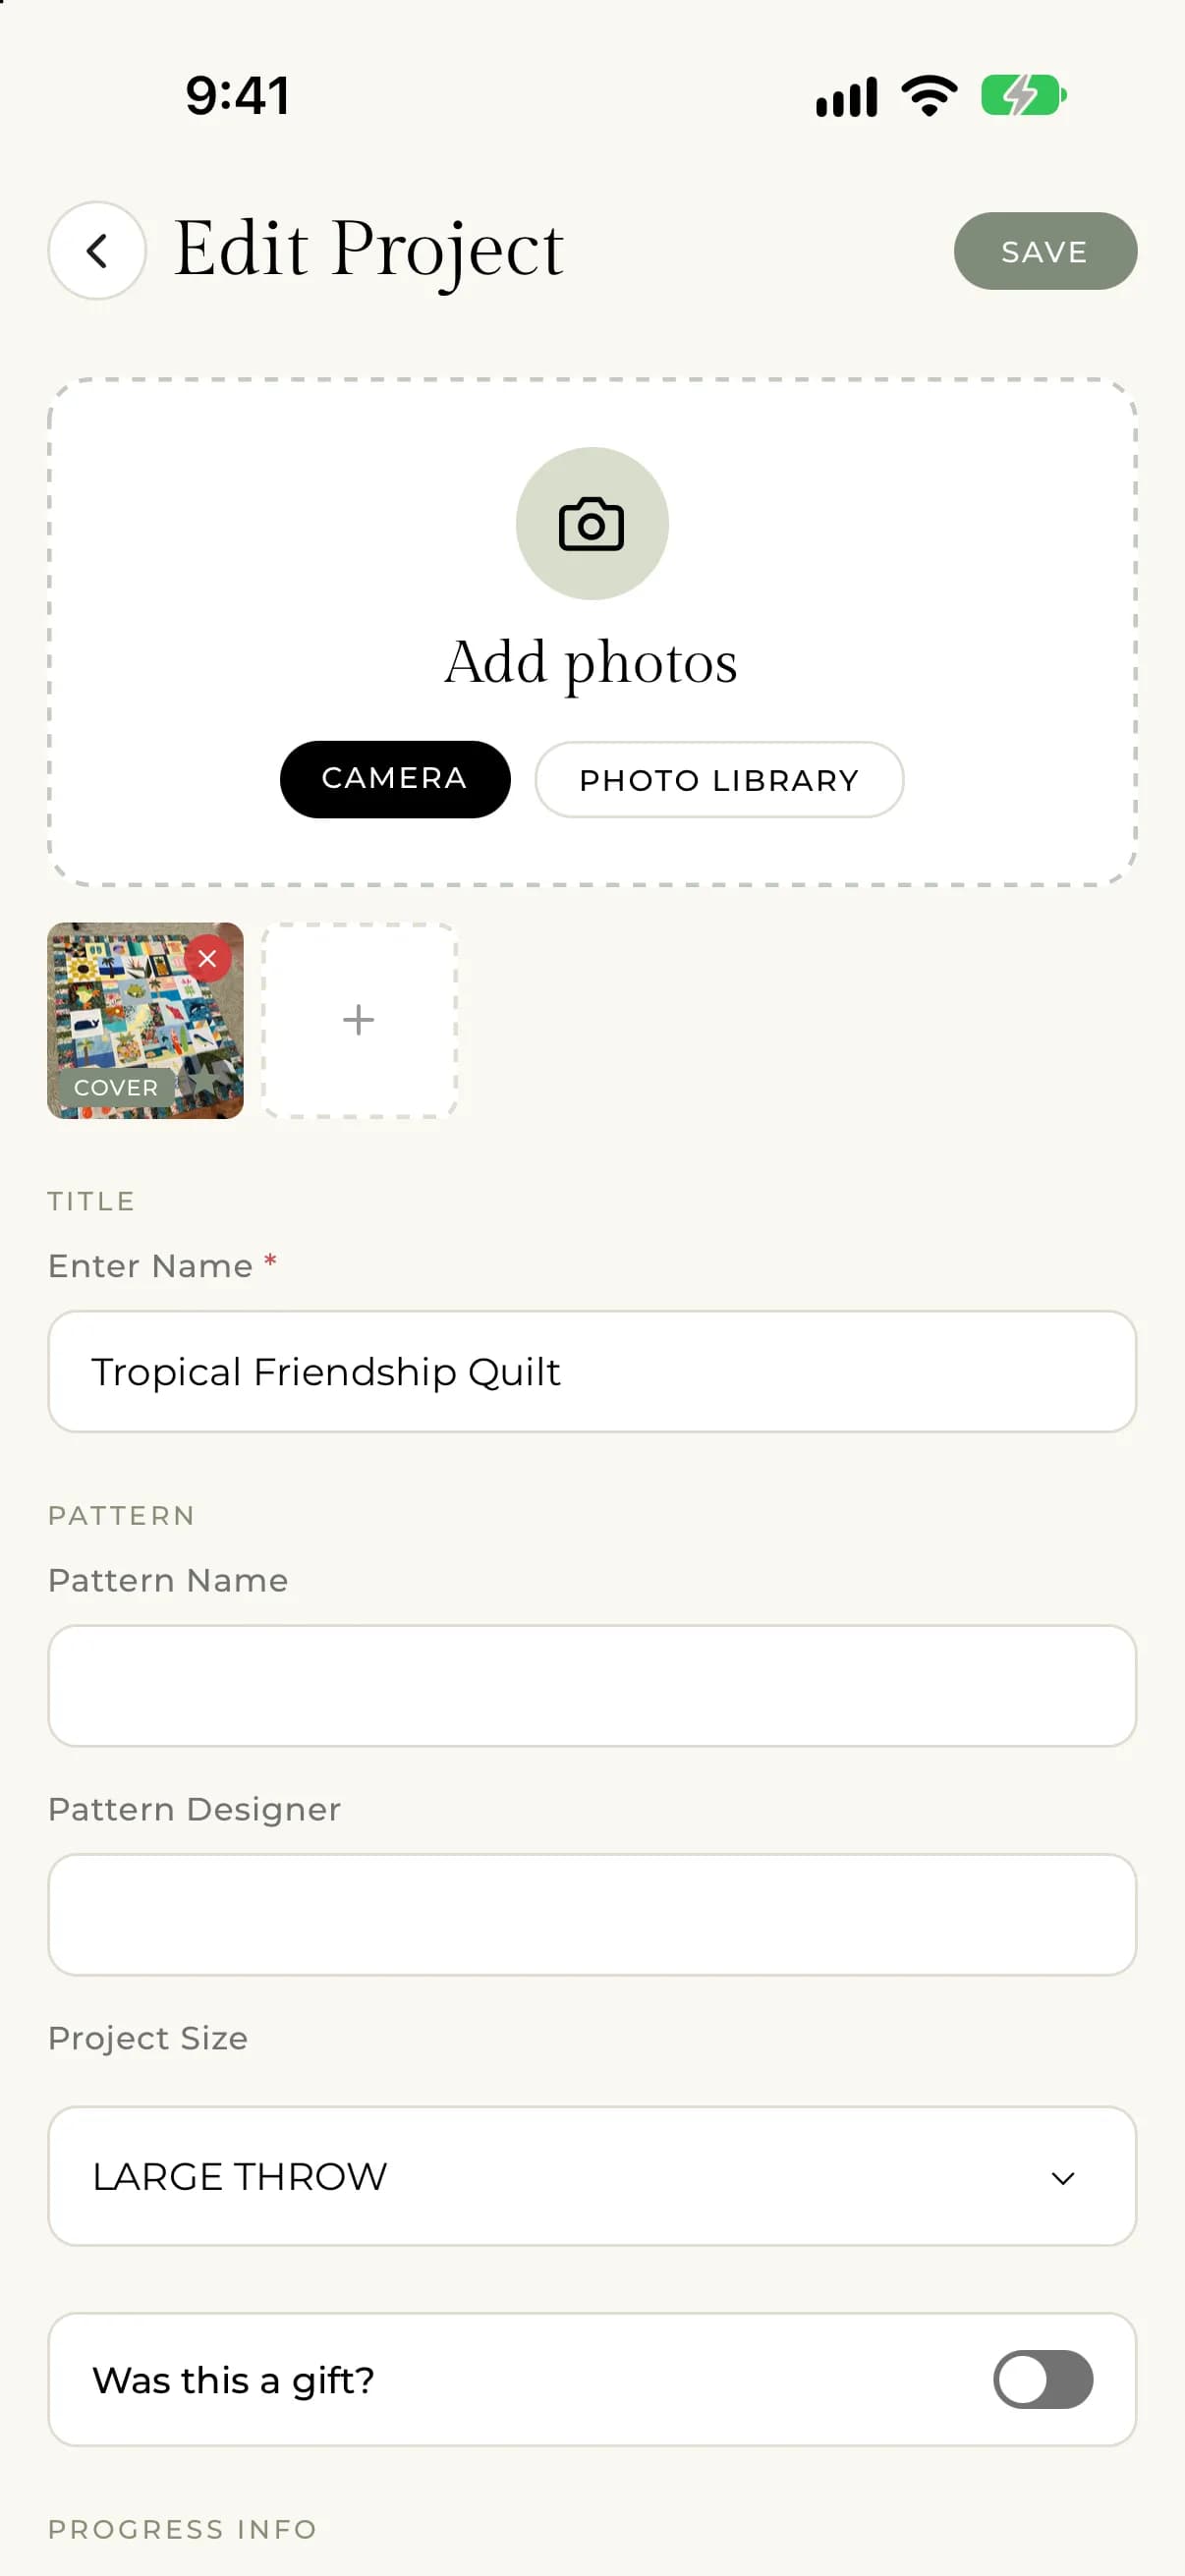
- Open the project and tap Edit Project, or start a new project with the + button.
- Under Add photos, tap Camera to take a photo or Photo Library to pick one or more.
- Tap Save.
To add more later, tap the + tile at the end of the thumbnails, either here or on the project page.
If you tap Camera and see "This app needs access to your camera to take photos. Please enable camera access in your settings.", allow camera access for My Quilts in your phone's settings, then try again.
- Open the project and select Edit Project, or select New project.
- Drag photos into the photo area, select browse files, or paste an image from your clipboard.
- Select Save (or Create Project on a new project).
To add more, select Add more photos. The page says you can add up to 20 images and that thumbnails for the feed are created for you.
Choose the cover photo
The cover is the photo people see first. It is marked Cover on your phone and Primary on the web.
Tap the star on the thumbnail you want. On an existing project you will see "Primary Image Set".
Select Set as cover photo on the thumbnail you want.
Remove a photo
Tap the small x on a thumbnail. On a project you have already saved, the photo is deleted right away.
Select Remove image on the thumbnail, then Save. The photo is deleted when you save.
If something goes wrong
- Photos larger than 20 MB are skipped. On your phone you will see "Some photos exceed the 20MB limit and were skipped." On the web the file is named in the error.
- If a photo fails to upload, the project is still saved. Open Edit Project and add the photo again.
- For photos that look broken, see Photos won't upload or look broken.